Are you new to blogging?
That’s why you have landed on this page.
So, you are wondering How To Create A Blog For Free And Make Money?
Do you want to earn money by blogging, if yes then you must have heard that there are a lot of folks who are making millions from blogging.
So, do you want to start your blog? If yes, then stay with me, I will tell you how you can make a free blog on the blogger platform.
It’s effortless to create a free blog on Blogger, follow the instructions.
Let’s dive in.
How To Create A Blog For Free And Make Money
First open your Internet Browser like Google Chrome, Firefox, Opera, etc. And type the address www.Blogger.com
Now you’ll be landed on the Home page of Blogger.
Once you landed on the page, it will ask you to log in with your Gmail id.
If you don’t have a Gmail ID, then you can create it or if you already have a Gmail ID then sign in.
Blogger is a Google product, so you need a Gmail ID to access it.
After that, there will be an option of New Blog on the left side, click on it.
A new pop up page will open in front of you, in which you will have to write your blog address and blog title.
See the screenshot below.
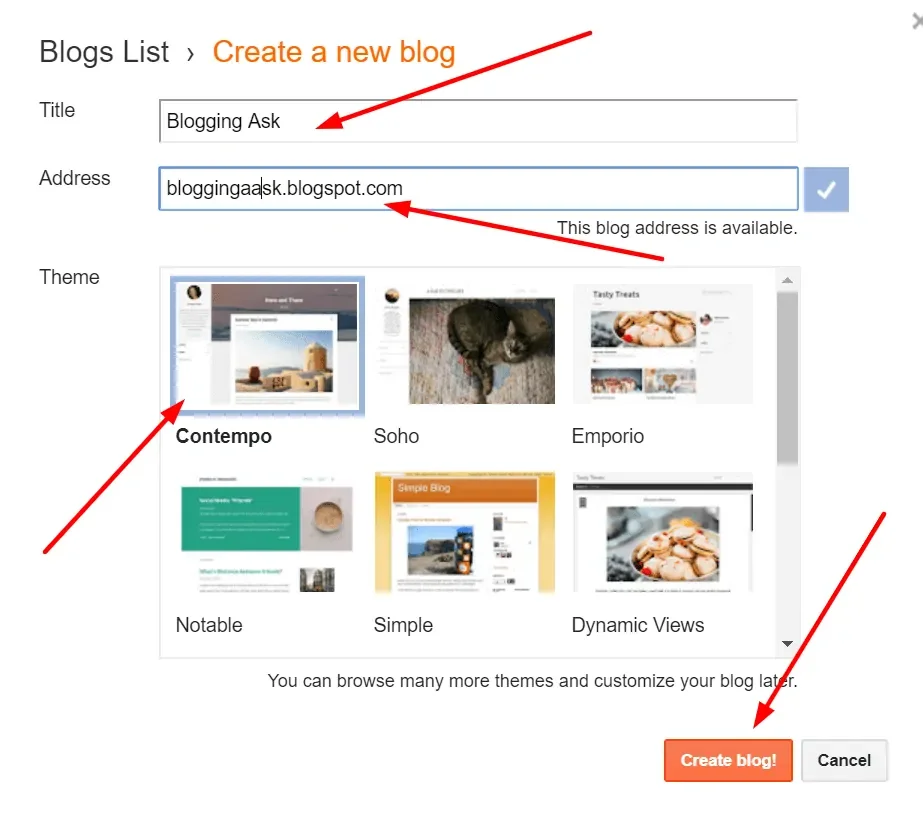
Title: -In this, you have to write the title of your blog, as I have added Blogging Ask.
You have to write the name in the same way, or you can write anything, keep in mind that it should match with your blog address.
Address: – In this, you have to write the address of your blog, as I have written, bloggingask.blogspot.com.
Just keep in mind that no other blog has ever been made before by the same address you are writing.
When you type the name in the address, it will show you on the right side whether the address is available or not.
If it is available, then you’ll see like this blog address is available, as you see in the image above.
And if its address is not available, then it will say sorry, this blog address is not available.
Now you have to select one of the below templates for the time being, but later on, you can change it.
Then you have to click on Create a Blog, and your new blog has been successfully created.
Congratulations you have successfully created a free blog on Blogger.
Maybe, by clicking on the Create Blog a new pop up page will open, then you have to proceed by clicking on no thanks.
You can see the screenshot below.
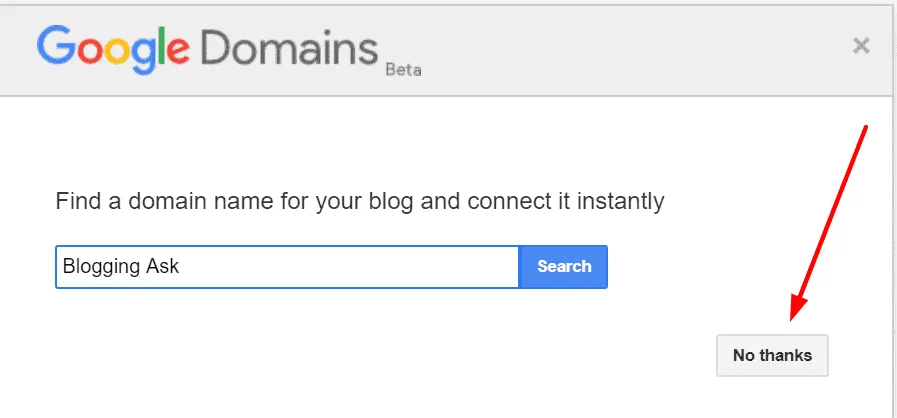
As I told you its a Google product, and once you will create your blog, Google will ask you for buying a domain.
Although you can start your blog with free blogger subdomain, I will recommend you to go for a custom domain.
It is always good to go with custom domains.
I am not recommending you buy it from Google, you can get it from Godaddy, NameCheap, etc. at a cheap price.
I recommend you explore all the areas inside the blog and try to learn about all the elements so that you will not face any problems in the future.
Now you have successfully created your blog, and you can design it according to your choice.
If you don’t like the pre-loaded Templates/themes then, you can go for Premium Templates.
So, let’s learn how to write your first blog post.
How to Write A Blog Post In Blogger
You must have learned all the elements of Blogger, and it’s time to write your first blog post.
Let’s dive in.
First Click on New Post.

Post Title
First, you have to write your blog post title.
It should be like “How to create a free blog on Google’s BlogSpot platform.”
For example, you can see the screenshot.
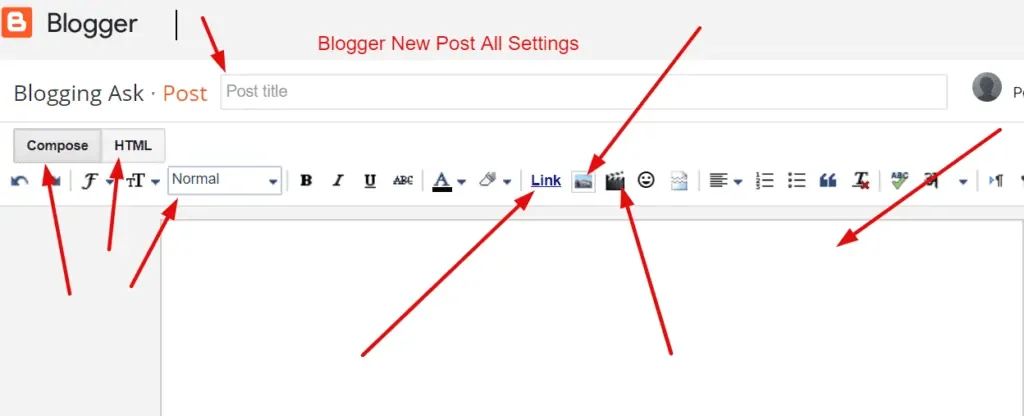
So this is your blog post title.
There are two ways to write articles on your blog one is Text Editor and the second is HTML
In the Left Side, you will see Compose/HTML.
I will suggest you write your blog post in a text editor. By default, it will take you to a text editor.
If you do not have HTML knowledge, then don’t try it.
Compose means that when you write Post in a simple Text editor mode.
And when we click on HTML, all the text will appear in HTML mode.
Decorate Post properly
When you write the Post, decorate it in a way like Heading, Sub Heading, Minor Heading etc.
Make sure that your blog post doesn’t have grammatical mistakes.
Even I too made many grammatical mistakes.
So, the right way is to use Grammarly to rectify your grammatical mistakes.
Though Grammarly is paid yet, you can use its premium version for free.
You need to install its browser extension irrespective of which browser you are using.
And if you do not know, then I can tell you in easy language, but when you work, you will understand yourself,
Let’s know the other important things related to your blog post.
As you can see in the screenshot above the text editor, you have all the essential things to decorate your blog post.
You can change the fonts, make them bold, underline, and italic. And you can also change the colors of the fonts.
You can also add external or internal links to your blog by clicking on the link.
You can add Images and Videos in your blog post according to the situation or when it requires.
So, you have written your blog post, decorated it, added links, images and videos, etc.in it.
Now, let’s understand the other aspect of the blog which are available in the right of the screen.
Important things before publishing the blog post
Levels: – In this, you can add the labels of the post, like if your blog post is on making money online, then you can add labels to make money online or online earnings, etc.
In other words, it is the category of your blog post.
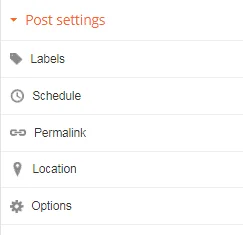
Schedule: – In this, you can schedule the post. If you have already written 2-3 blog post together, then you can publish it daily or schedule it.
If you fix the time and day by putting it in the schedule, then that post will be automatically published.
Permalinks: – This is the URL of the post, which you have to create with care because there should be no mistakes while creating the URL. Otherwise, it does not show up quickly in the search engine.
According to the latest Google algorithm, your blog post URL should not be too long.
Make sure that your blog post URL should match with your post title.
Location: – In this, you can put the location of the post, in most of the cases it does not work.
So, it would be better to leave it.
Search Description: In this, you have to add a short description of your blog post, which will show in google search engine.
The blog post description should be Cathy so that when it will show up in Google search engine visitors will not hesitate to click on it
See the screenshot.
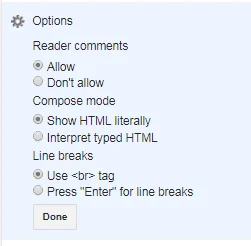
Options: There are some necessary settings for the blog post written in it. Let’s know what that?
Reader Comments: – Users who will read your post can comment on your blog post, if you want to allow it, then you have to select allow option, and if you don’t want to choose then don’t allow it.
So, blog post settings are complete now it’s time to hit the publish button.
On top of the right side, you will find four buttons.
Publish, Save, Preview, Close

Publish: – Now it’s time to publish the blog post by hitting the publish button. That’s it your blog post is live on Google.
Save: – This will save your blog post in draft.
Preview: – By clicking on the preview, you can see the preview of the blog post.
I recommend you always preview hour blog post before you hit the publish button.
Close: – This will close the Post page, and you will go to the Blogger Dashboard.
Conclusion
So, friends, you have lean How To Create A Blog For Free And Make Money and how to write your first blog post.
If you wish to start your blog on WordPress then you can buy a good domain and host from a good company like A2 Hosting.
Over to you.
If this article helps with your query about How To Create A Blog For Free And Make Money on Blogger, then consider it is sharing it with your friends who also want to create a free blog on Blogger in 2023.
Because Sharing is Caring.
Happy Blogging.
Thanks for your time
Goodbye.
Ready To Make Money Affiliate Marketing
Learn These 7 Pillars of Affiliate Marketing I’ve Used To Create A Hyper-Profitable Affiliate Business From Scratch So You Can Make Your First Commission Online…


![17 Terrible Amateur Bloggers Mistakes [Tips To Avoid] 11 Amateur Bloggers mistakes](https://bloggingask.b-cdn.net/wp-content/uploads/2022/01/Amateur-Bloggers-mistakes-768x415.webp)
![How to Start A Blog From Scratch in [year] (Under 20 Minutes) 14 How to Start a blog from scratch](https://bloggingask.b-cdn.net/wp-content/uploads/2020/09/How-to-Start-a-blog-from-scratch-768x402.webp)
Thanks for the sharing biggest article
Thanks, Ashok