With the convenience of today’s technology, it is very easy to create payment forms and integrate them with different payment gateways.
The best way to do that is by using plugins like WPForms, creating and integrating Payment Forms with Payment gateways super simple.
This guide will show you how to create payment forms for Authorize.net using WPForms.
Here is a tutorial on how to set up Authorize.Net so you can accept one-time and recurring payments securely using WPForms.
For the payment form, I will be using WPForms and integrating Authorize.net.
Please use the link below to purchase a WPForms license if you do not already have one.
How To Create Payment Forms For Authorize.net in 4 Simple Steps Using WPforms Plugin
Step 1: Install & Activate WPForms Plugin
Install and activate WPForms if you have purchased an Elite license.
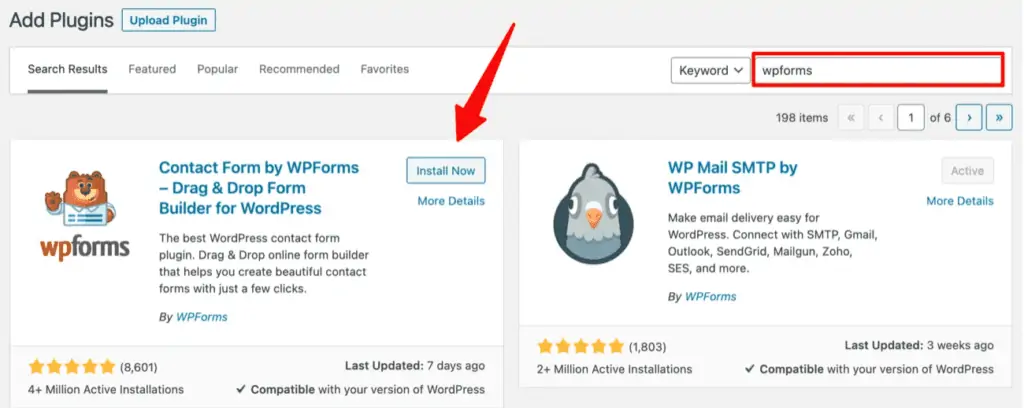
Just go to Plugins>>Add New and search for WPForms.
Click on Install Now and then Activate the plugin.
To activate the premium features, paste the license key and click on Connect.

Step 2: Activate the Authorize.net Addon
Just go to Dashboard >> WPForms >> Addon > Authorize.Net.
Click on Activate to enable the Addon.

Step 3: Connect Authorize.Net to Your WordPress Website
Connect Authorize.net to your WordPress website in order to process payments smoothly.
For this, go to WPForms>>Settings and click on the Payment tab.
You can choose the currency of your choice.

Visit the Authorize.net section of the page.
Authorize.Net requires you to enter both your API Login ID and Transaction Key to enable the connection between your forms and the payment gateway.

These details can be found in your Authorize.net account.
Log into your Authorized.net account and ensure your Authorized.net account is in Live Mode and not Test Mode.
Go to Settings>>API Credentials and Keys.

Copy and Paste the details in the WPForms tab.

Now you will need to enter the Transaction Key.
It is available in the API Credentials and Keys section in your Authorize.net account.
Select New Transaction Key in the Obtain option here, and then click Submit.
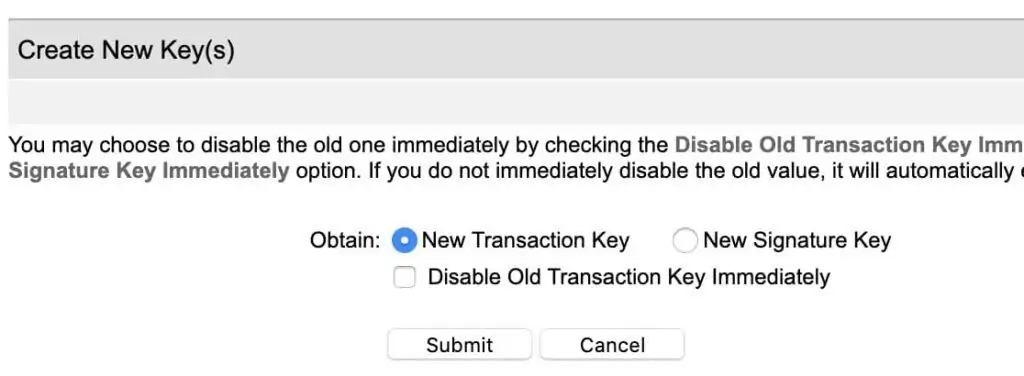
To verify your identity, you’ll get Pin to your email address. Verify the Pin to complete the process.
The Transaction Key will be displayed on your screen once you have completed all the steps above.
Just copy and paste it into the WPForms Tab and save the settings.
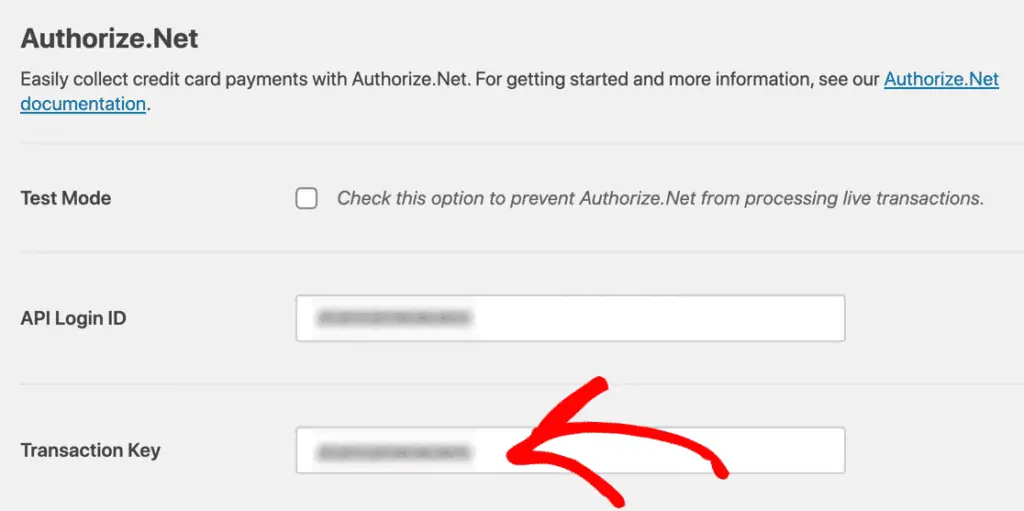
The Authorize.net account and WPForms account are now connected.
Step 4: Add Authorize.net to your Payment Form
To complete the process, you must integrate your Payment form with your Authorize.net account.
Depending on your needs, you can either create a new payment form or edit your existing payment forms by clicking the edit button.
After opening the WPForms builder, you can easily add the Authorize.Net field to your form. It can be placed anywhere you like.

By dragging and dropping, you can easily edit and place different fields.
Click on the Enable Authorize.Net payments option under Payments » Authorize.Net after you have completed editing the form.
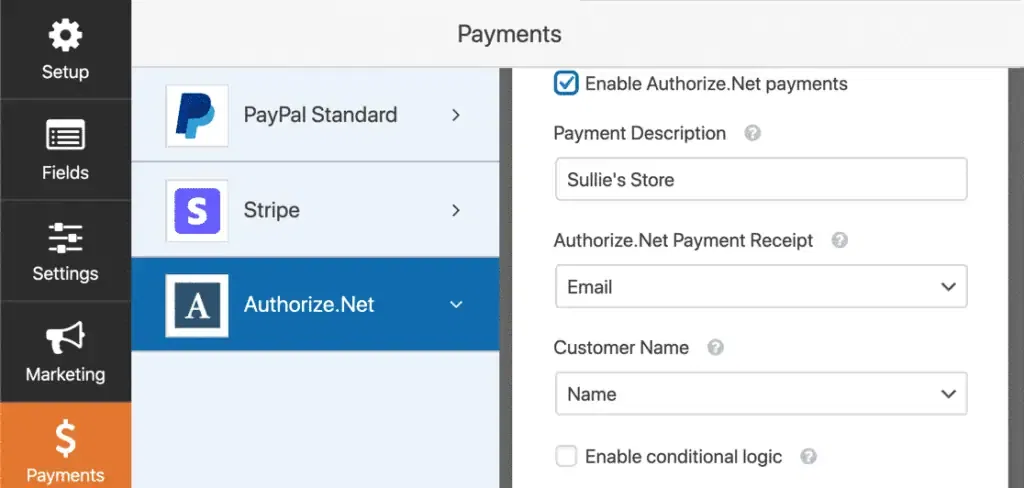
You should now be able to accept payments via Authorize.net on your WordPress website.
In addition to enabling the Authorize.net payment, you also need to make the following changes:
- Please enter a description of your payment.
- Choose Authorize.Net Payment Receipt. If you choose Email, Authorize.Net will send you a receipt.
- Choose Customer Name from the Customer field.
- Make further adjustments as needed.
Save your form and exit.
That’s it. Payment forms can easily embed on any website page using the shortcode or WPForms block in the Gutenberg editor.
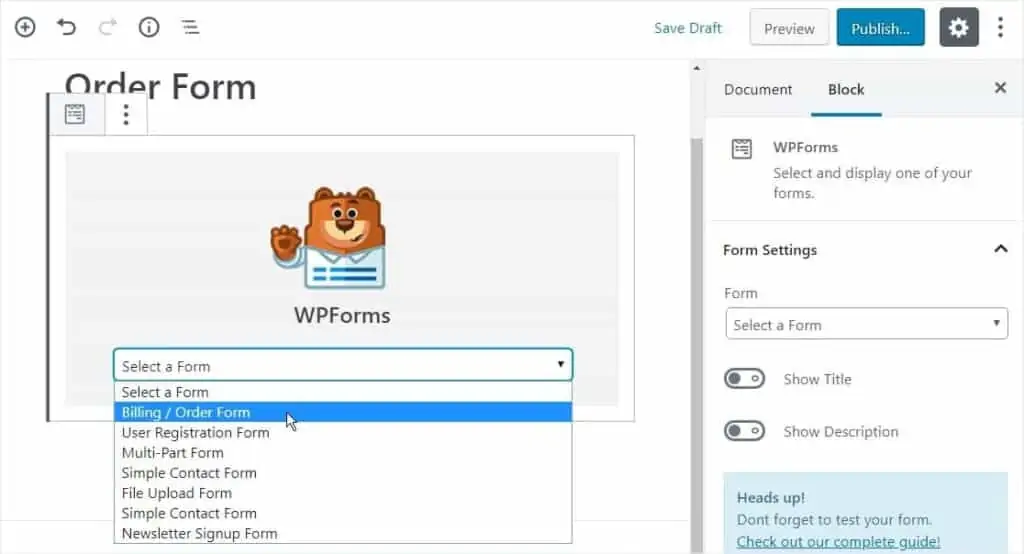
Your Authorize.net account is now ready for accepting payments.
Wrapping up
Authorize.net Addon by the WPForms team made it easy to integrate payment forms with Authorize.net.
It is easy to use a lot of their add-ons since they have so many options.
In this post, I have shown you How To Create Payment Forms For Authorize.net on a WordPress website.
Let us know what you think of this WPForms Addon if you’ve used it.

Ready To Make Money Affiliate Marketing
Learn These 7 Pillars of Affiliate Marketing I’ve Used To Create A Hyper-Profitable Affiliate Business From Scratch So You Can Make Your First Commission Online…


![15 Best WordPress SEO Plugins in [year] (To Boost SEO) 17 Best WordPress SEO Plugins](https://bloggingask.b-cdn.net/wp-content/uploads/2023/05/Best-WordPress-SEO-Plugins-768x415.webp)